
Optometry Social Media Marketing
Do you want to promote your eyewear on social media? Want to take better photos that will resonate with patients?
Say that you want to use a Facebook Ad to reach the wider community. Imagine your exposure…thousands of people who are right nearby!
Lets take an example:
The image below shows a new range of frames with an unconditional manufacturer warranty.
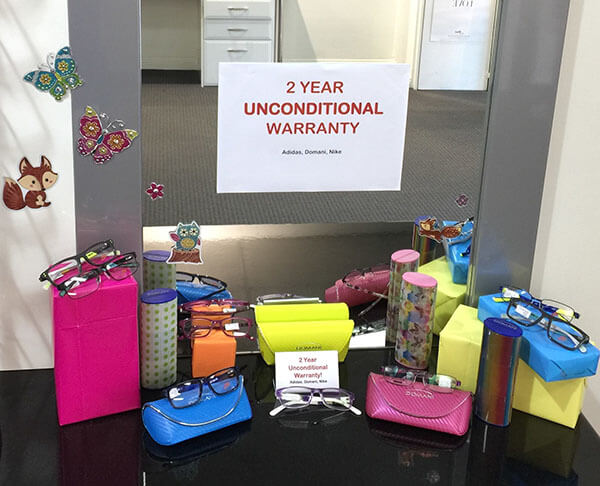
In this image, I like that:
- The image is in-focus
- The items are free of dust
- They’re arranged in an interesting pattern, along with the cases
- There’s minimal text showing in the image
What can be done to make it better?
First, do you need to use a more expensive camera?
Well-known Australian Photographer, Ken Duncan, was invited to judge a photography competition for kids.
After looking at the array of images, he was impressed! Some images were taken with pretty expensive gear. (With Mum or Dad holding their breath behind the scenes!)
But the winning image wasn’t.
It was a photo taken in the back of a moving bus, travelling at 80kph (50mph).
And using a disposable film camera….
What does this mean for your social media images?
You can use any camera you like!
So, how do you take a great image?
You need to know how you would sell your new frame range to patients. In your own words, how would you describe the benefits to them?
Better yet, what words would patients use to describe what frames they’re after? For example, they might say, “my son is rough with glasses” or “I need something indestructible”.
Then think about how you can show this key feature in the simplest way possible.
Patient’s don’t have time to think. They’re too busy.
What is the number one thing you can do to take better photos?
Here it is….
1) Use a plain background!
A good background can be white, black or a coloured texture. On Instagram, some of the best eyewear photos are taken by looking down on a wooden tabletop.
Avoid using frame stands, displays or cabinets. These aren’t part of the eyewear sale.
Ensure that the eyewear is the hero of the image.
Similarly, avoid having too many colours in your image. You want patients to look at the eyewear, not around it.
Like this article? Tap here to join my free email newsletter, and never miss an update.
2) Turn off the camera flash!
The light from your smartphone flash is great for finding things in the dark…. But it’s no good for taking good photos.
The flash produces unwanted reflections off the eyewear. (This is a bad idea, since the brain is attracted to the brightest parts of the image. You don’t need to highlight the demo lenses.)
The flash also produces harsh shadows just behind the eyewear. Your frames don’t look their best.
How can you get around this?
If it’s an overcast, calm day, shoot outdoors. Clouds produce lovely diffuse light. And no harsh shadows.
If it’s windy, sunny, hot, cold or impossible, then take photos next to an available window. You’ll get great diffuse light, with no shadows. If you notice that one side of the eyewear is too dark, ask a colleague to find a piece of white card. Hold this up near the darker side of the eyewear. The closer, the better, to improve darkness.
3) Cleanliness is next to godliness….
The cleaner your eyewear and light-tent, the less work you’ll need to do later. Photoshop can remove spots easily. But it’ll save you time if you don’t have to remove the same spots from your images, time-after-time.
4) Use this software (for Mac or PC)
I love using Adobe Photoshop Lightroom. It’s a great way to catalog your images, and edit them too. That is, make them brighter, warmer or reduce noise. If an image still needs work, then I use Adobe Photoshop
(mainly for the Clone Stamp Tool or Healing Brush.)
Do you want consistently great images, regardless of the season or time of day?
If so, then you’ll want to have a certain area set up indoors. Or at least somewhere where you can place things in the same position, each time.
You’ll need a light-tent. It’s a flexible box with white material on the outside. Mine was similar to this one from Amazon.
Also, grab a floor-mounted light, like this one. Position the light off to one side of the light-tent. Then put your eyewear frame in the centre of the light-tent. Angle the frame until you’re happy with the lighting pattern.
Mount your smartphone on a tripod. For mounting my iPhone, I use Quadlockcase.com. Set the tripod at a consistent height. So you can come back to it later.
Also, use the rear-facing camera. This usually has a higher resolution (i.e. megapixels). It’s always easier to downsize the images, than try to make them larger afterwards.
If you use an app that allows more control over the photos (e.g. Procamera on iOS)
- Use a high Aperture (e.g. F22): this means that all of the frame is in focus at once
- Use a low ISO: this means that your images won’t be too ‘grainy’
Final Tip:
Save your image to Dropbox. View the image on different devices. Ask your colleagues to check it on their phone and desktop computer. That way, you can see whether the image looks too bright or dark. You can adjust the light angle or distance.
Did you notice the image of the Green Spy Goggles with the mirrored lexan? The mirror was a real headache. So, I used Photoshop to create a Gradient. I realise that it’s not real. However, it gives patients an idea of what the goggle looks like!
Conclusion:
When you’re happy, you can shoot away! Your image will be easy-to-understand, elegant and bring more patients to your practice!
Want more like this? Tap here to join my free email newsletter, and always stay up-to-date.